Post in category
- Shopify
- How to embed a script in a website
- Installation to platforms
- Javascript API
- Rest API
- Determining the status of form validation
- Setting the callback function after validation
- General service settings
- Input mapping - manual settings
- Input mapping - web configurator
- Installation to a web form
- Country switch settings
- Cookies 2022
Shopify
The connection to Shopify is made by inserting the Foxentry API key directly into the Shopify Foxentry application. Only users with the Shopify Plus plan can use Foxentry on Shopify.com. Without this plan, it is not possible to modify the checkout process.
If you do not yet have an API project set up, please do so here:: App.foxentry.com. Not sure how to do it? You can find all the necessary information for creating a project at: Foxentry.com/help-center/rest-api.
How to connect Shopify & Foxentry?
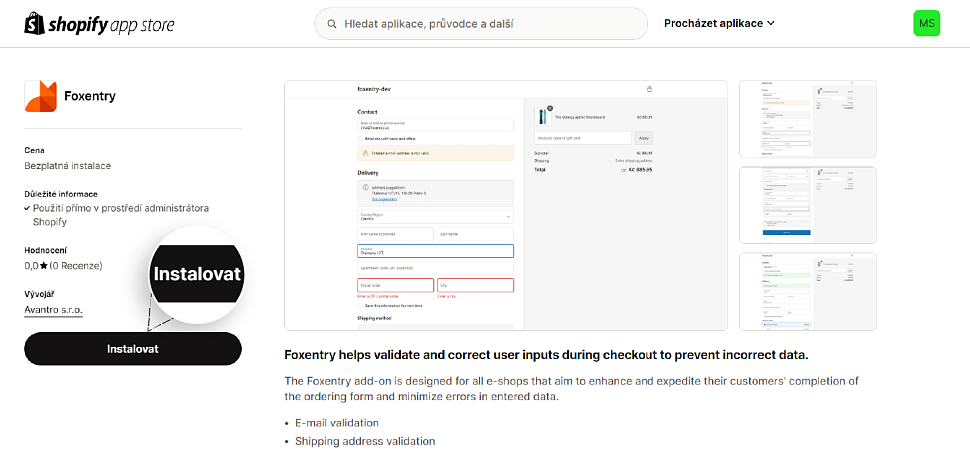
- The first step is to install Foxentry into Shopify. You can find the app at this link Foxentry for Shopify.com.
- Once you are logged into your Shopify.com account, the link will direct you to the displayed page. There, click the Install button.
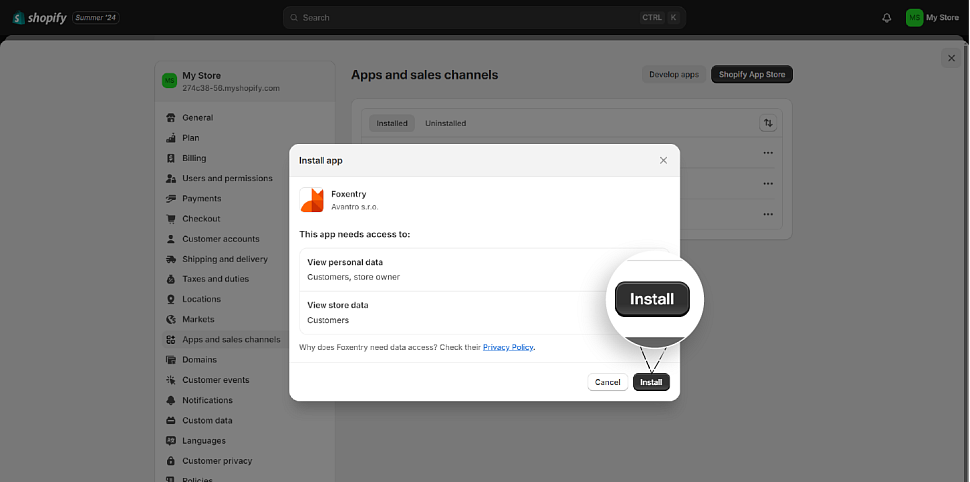
- The Shopify App Store will take you back to the Shopify.com application. Here, you need to confirm the installation of the plugin.
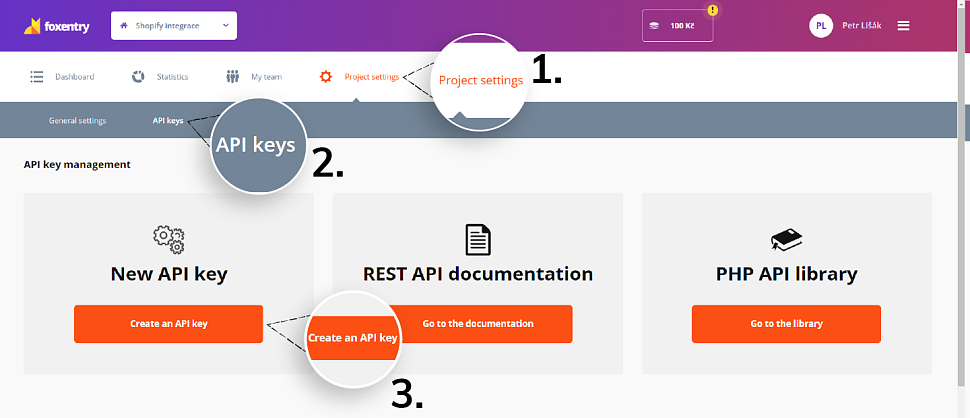
- Now you need to create an API key in the Foxentry application, which you will find within the Foxentry app. In App.foxentry.com choose Project Settings and then select the API keys section. Click on the New API key button there.
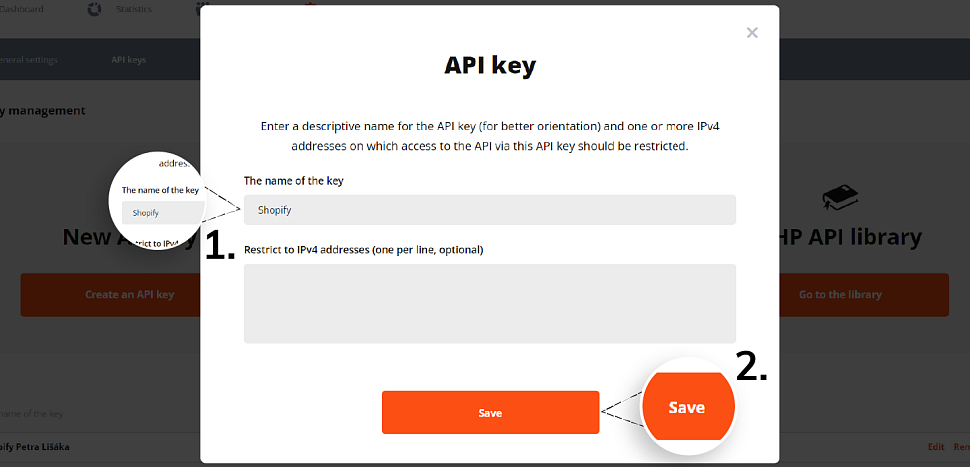
- In the opened pop-up window, give your API key any name you like and click the Save button.
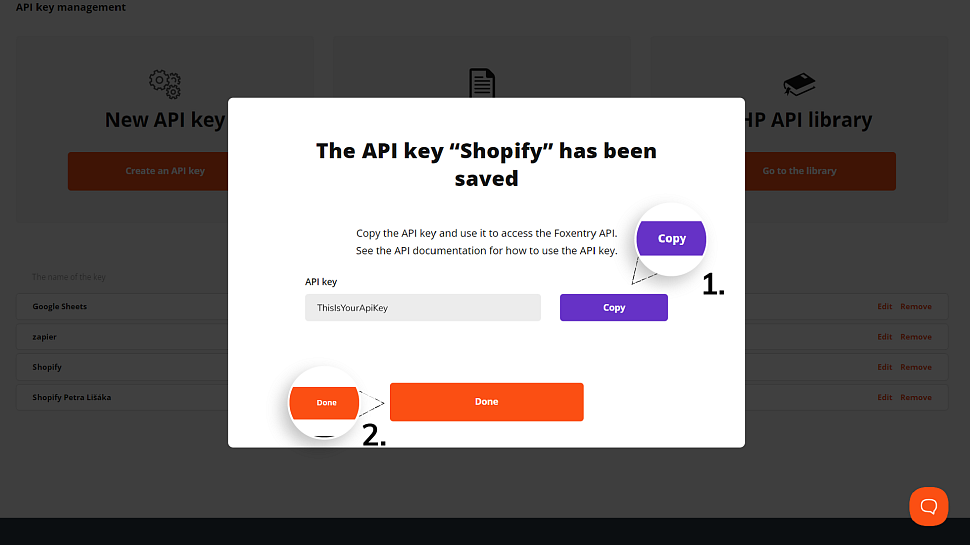
- Click Copy and get the newly generated API key and click the Done button. shopi
- Now you need to paste the copied API key into the Foxentry app (1.) in Shopify.com. You'll find Foxentry app (1.) displayed on the left-hand side menu. Click on it, paste the API key (2.), and select Save.
- Done! You have connected Foxentry and Shopify.com. Now all that's left is to configure the forms in the Checkout section.
- Click on the gear icon Settings in the left sidebar menu.
- In the settings, select the Checkout section (1). To use Foxentry, you need to have Checkout extensibility upgraded (2), which is a tool that allows you to modify the checkout process. You can find more information about it here: Help.shopify.com. Next, click on the button Customize (3.)
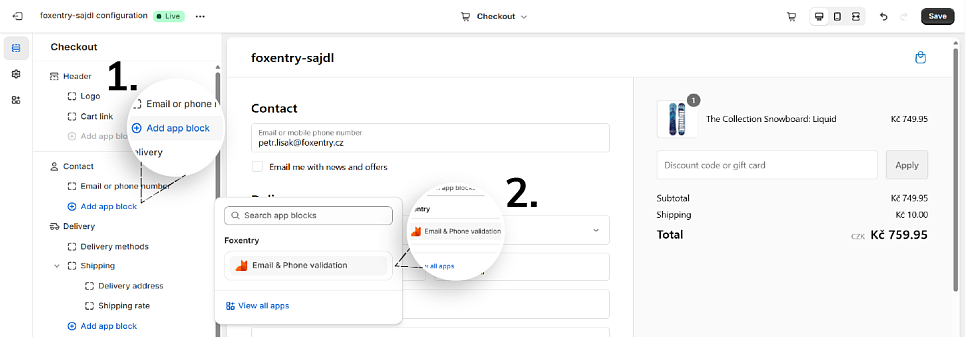
- Now in Checkout, you can customize individual fields and add external applications to the process. First, you need to connect email and phone validation settings. Simply click on the Add app block button (1.) in the Contact section. This will open a window where you can find Email & Phone validation.
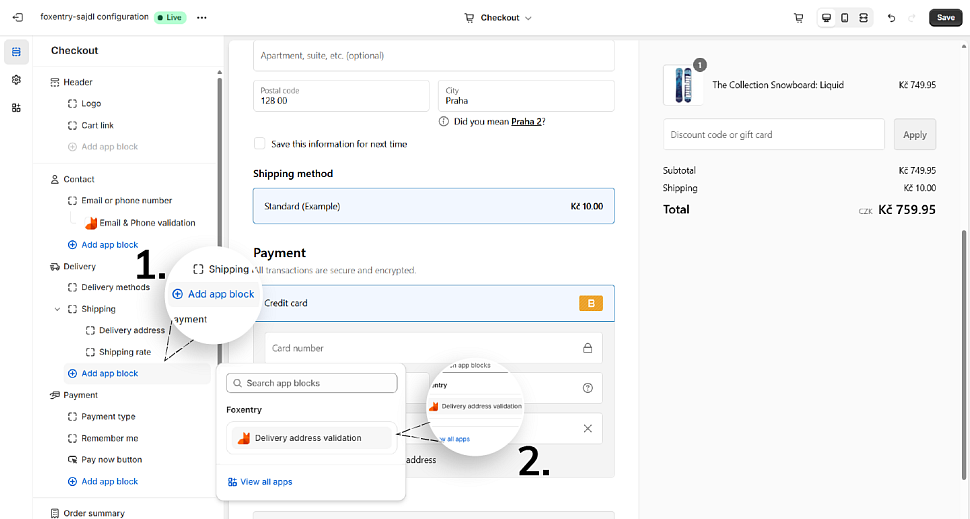
- Next, set up the validation for the delivery address. In the Delivery section, follow the same process as setting up contact information validation. Click on Add app block (1.) and select the Foxentry application again, this time choosing Delivery address validation (2).
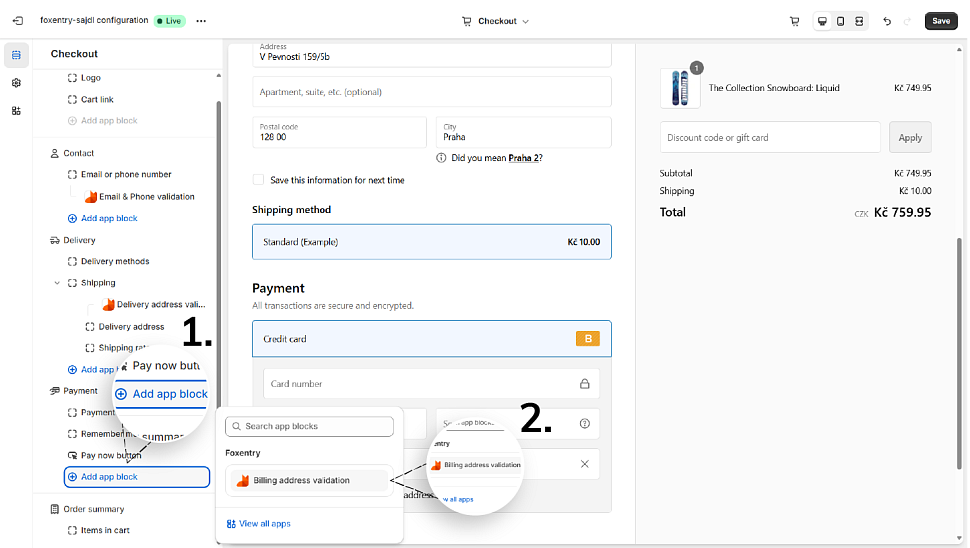
- The final step is to set up the billing address for invoicing purposes. In the Payment section, again, click on the Add app block button (1.) and then select Billing address validation (2).
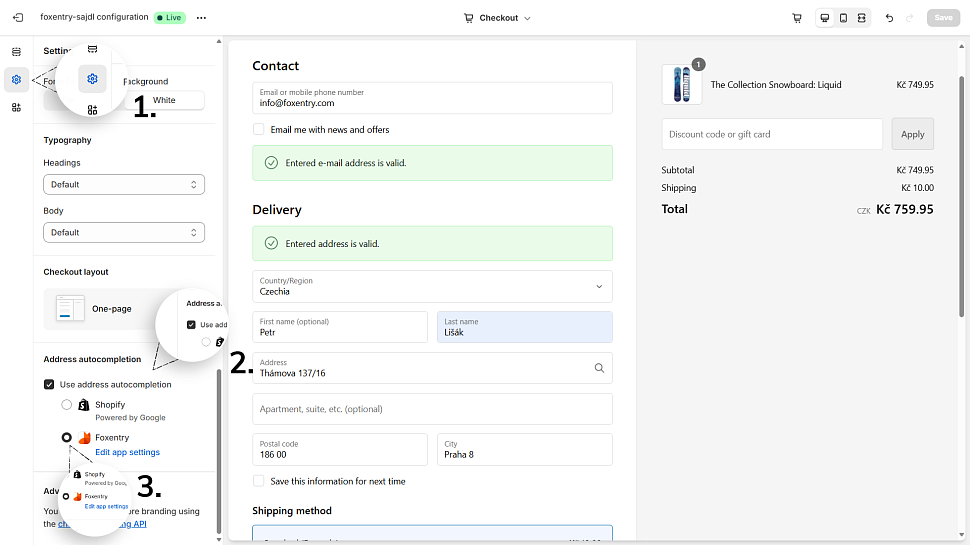
The last step is to configure the suggestion service. Click on the Settings section (1.). Scroll down to the end of the displayed menu, where you will see the Address autocompletion section (2.). Select the Foxentry (3.).
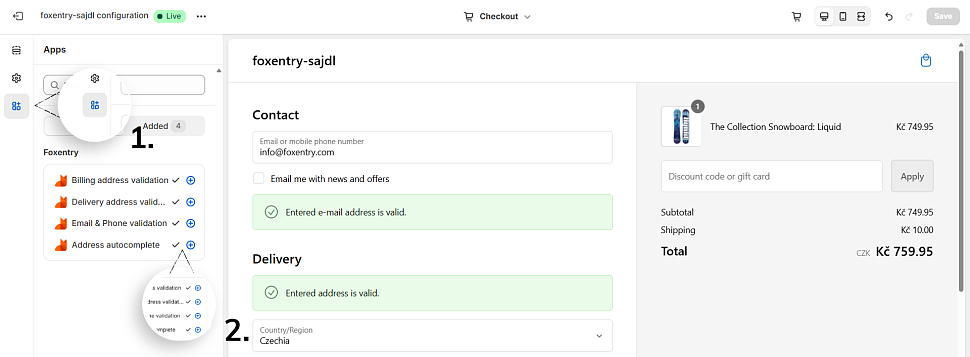
Now that you have all attributes properly set up, after clicking on the App button (1.), you should see all three validations set up on the left side (2.). Below the Contact section in the checkout, you'll see fields displaying the validation results for entered contact details (3.), similarly above the Delivery section (4.). You'll find the same fields below the payment address section as well.
You have now successfully connected and configured Shopify.com with Foxentry! If you have any questions, feel free to contact us at [email protected]
Still having trouble? Leave us a note.