Input mapping - web configurator
In order to use Foxentry properly, you need to map the form entries (fields) on your website. You can use our configurator to map inputs, where you'll mark the individual fields in order to know what they're used for.
- Make sure you already have the Foxentry script embedded in your site.
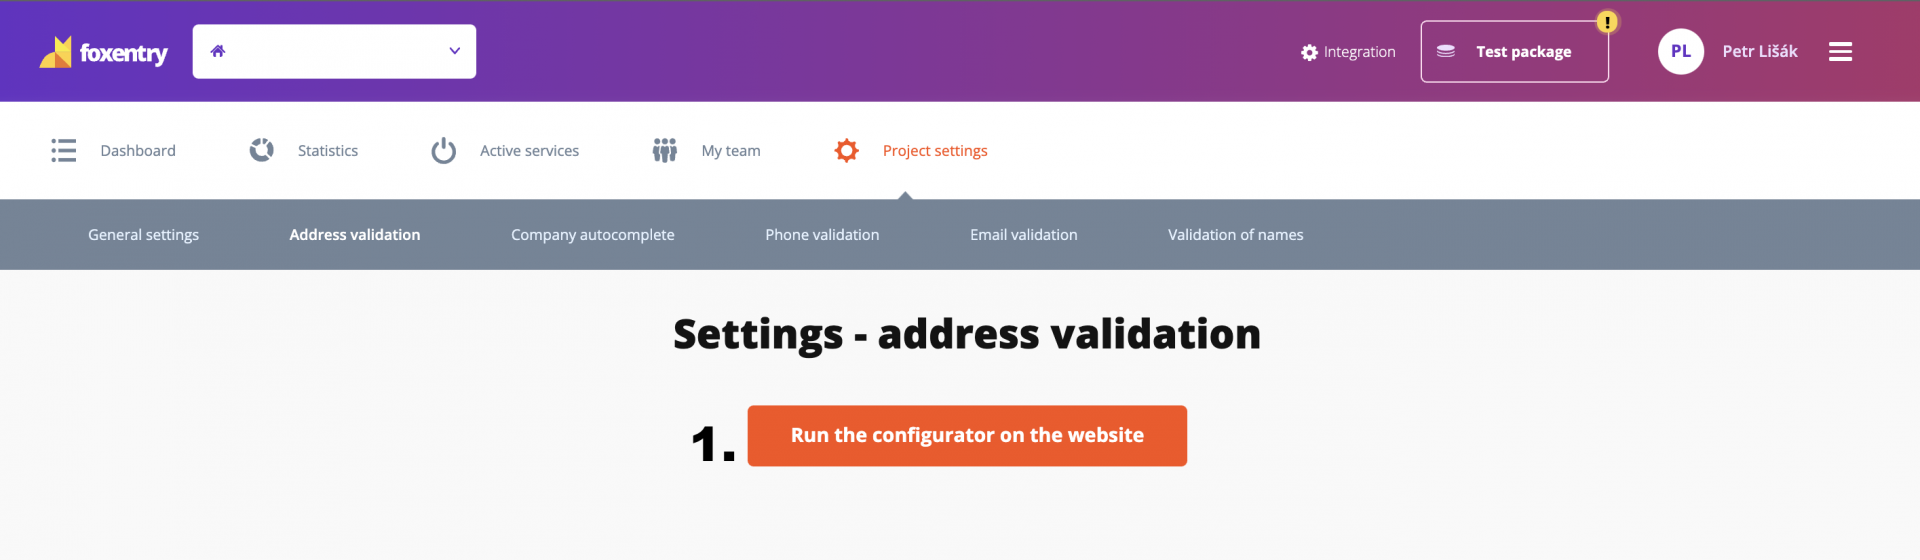
- In your project, go to settings and click on the service you want to set up in the top menu.
- Click on Run web configurator and you'll be redirected to your website.
ATTENTION: If you do not have a script embedded in all your subpages, the configurator may not work properly.
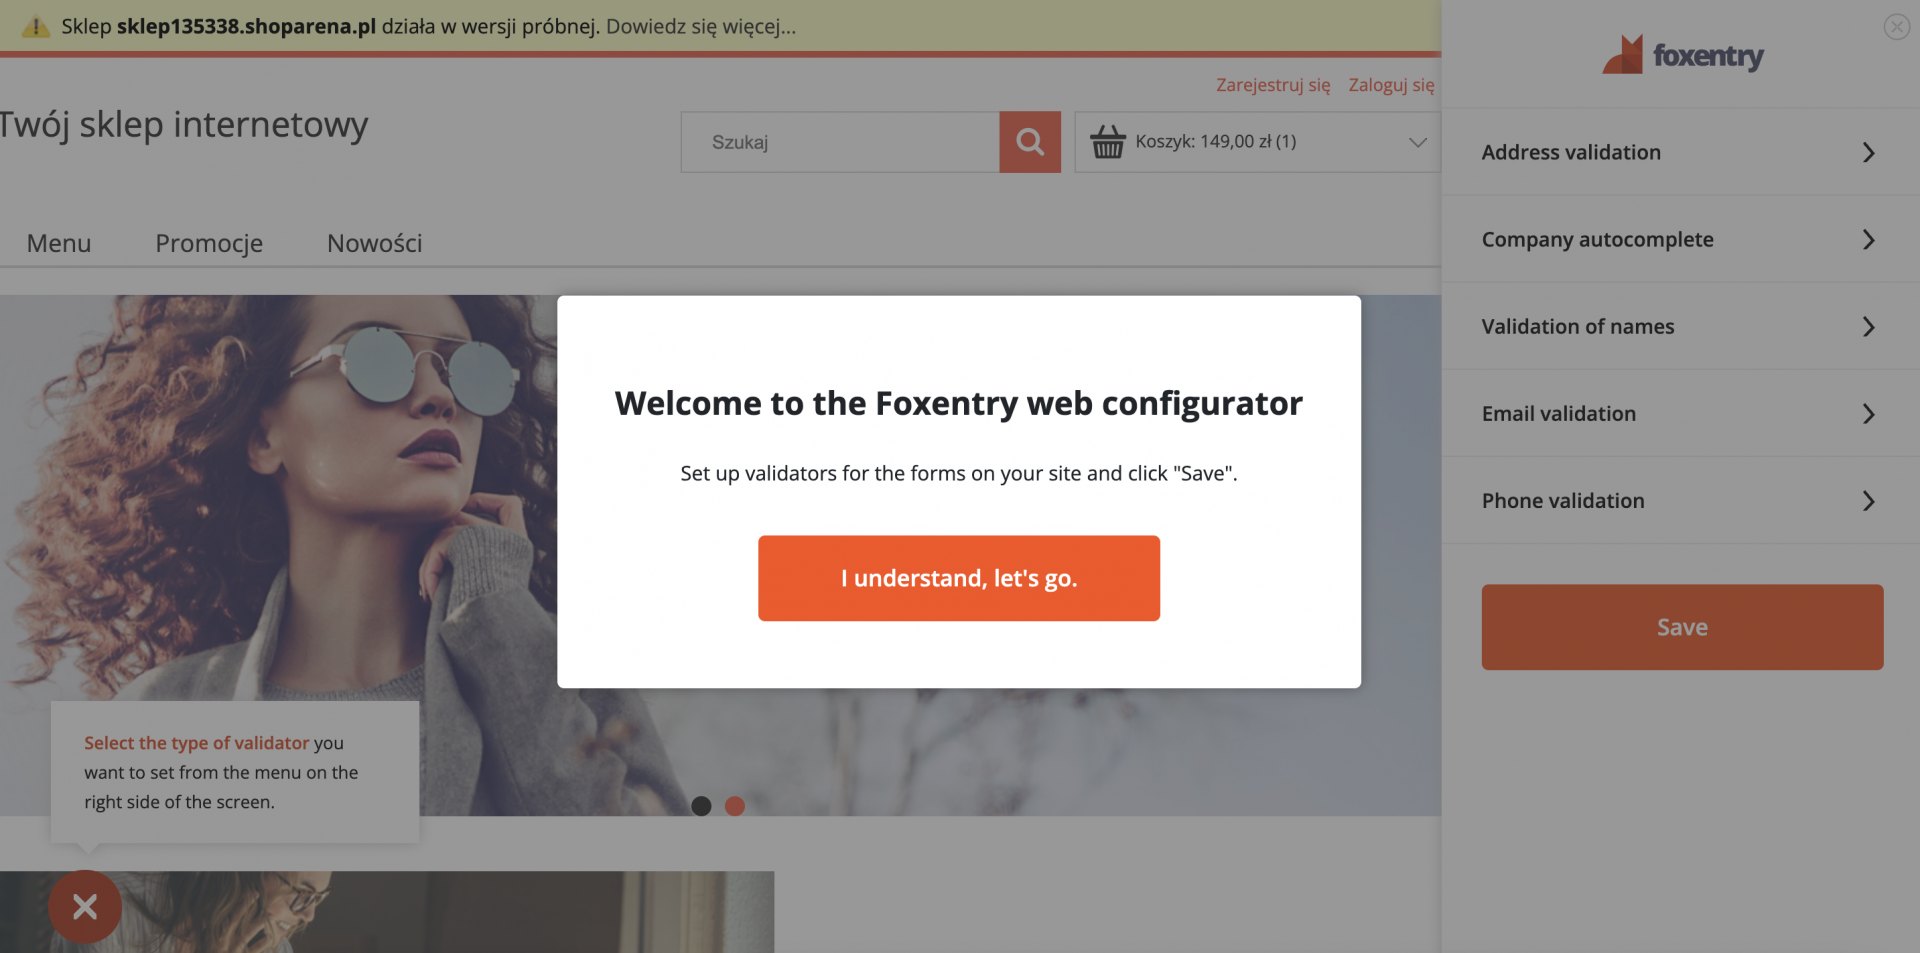
Now all you have to do is click on the introductory text button of the configurator and then click on the subpage of your form where you want to use our services.
Choose a service and mark the form entries
Click on one of the services in the sidebar to start setting up individual validators. Think of the validator as a group of columns that are related to each other - in the case of autocompleting addresses, it could be a street, house number, city, or postal code. If you select a street from the autocomplete, the rest of the address fields will be filled in. Sometimes you might need more of these validators. In the most common cases, it's when the form includes a billing address and delivery address - 2 different addresses that you need to be separate.
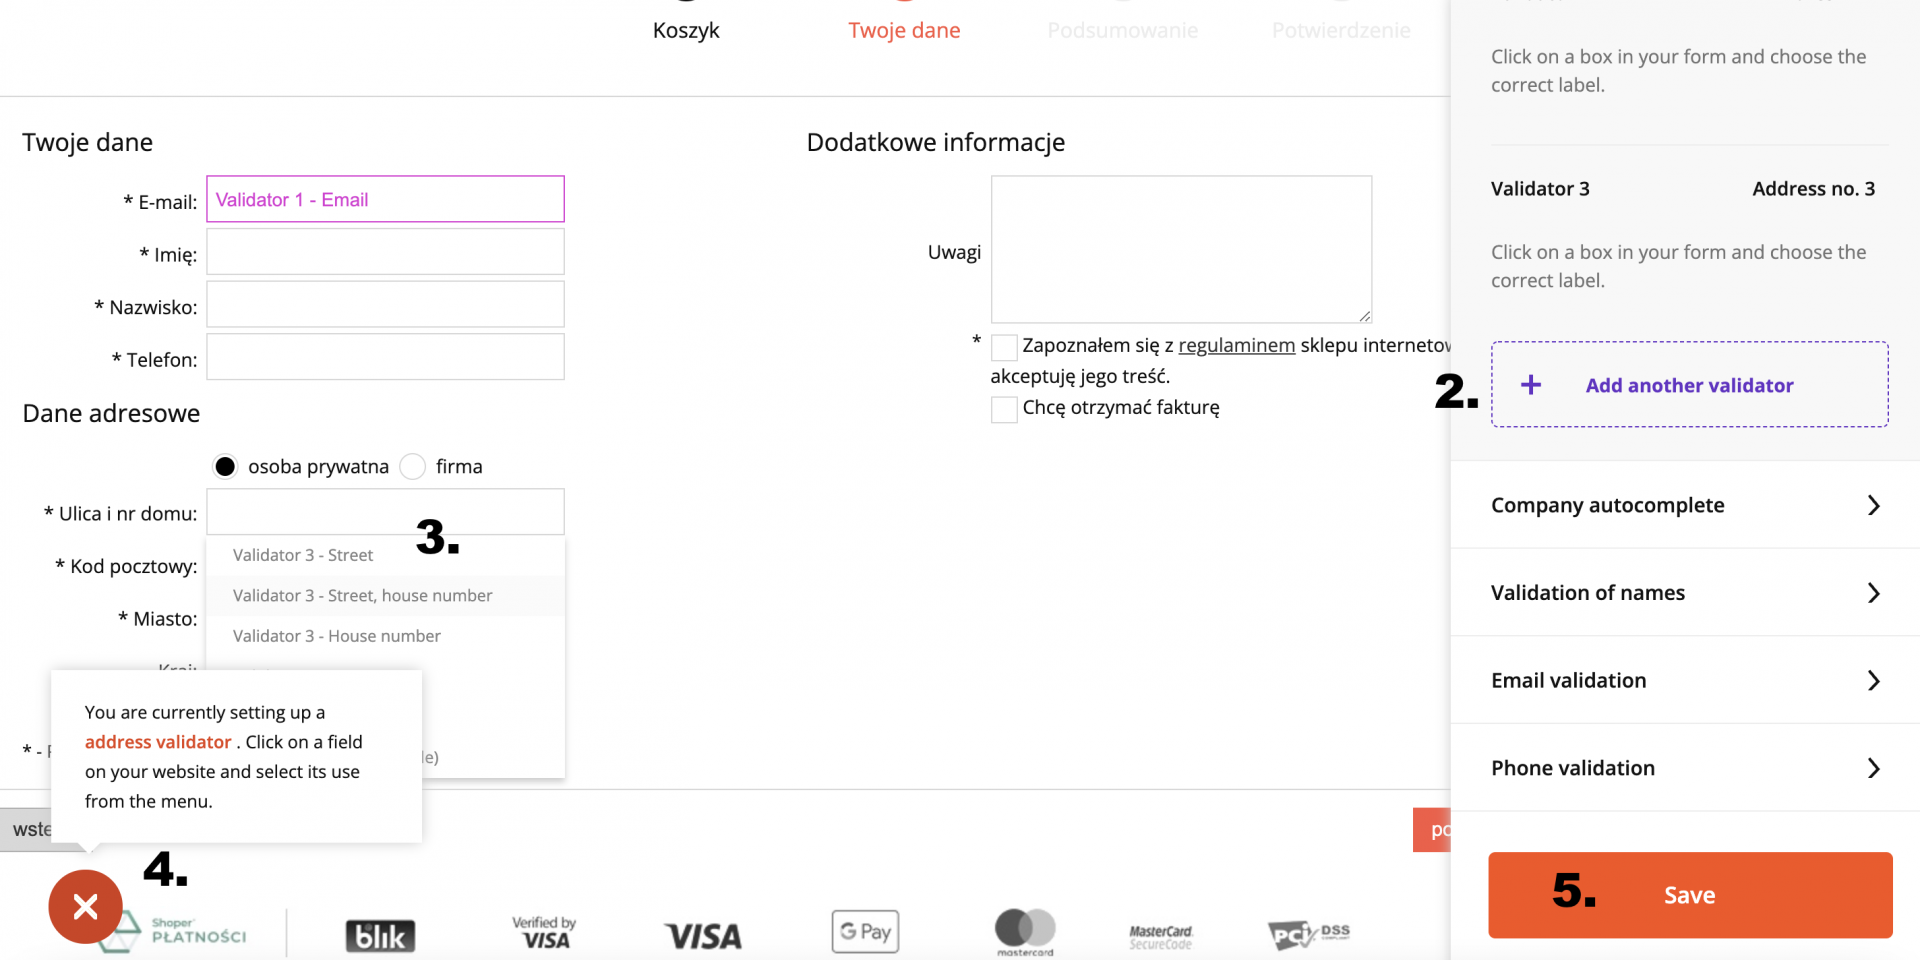
- In the right column, select Address Validation. Click on Add another validator and create the first "group" of fields. You can rename the validator, for example, to "billing address".
- Now all you have to do is click on one of the fields of the form and a menu of various settings should appear in the autocomplete. Now just choose from the individual variants and assign a function to the field. Repeat this procedure for all relevant fields (in our case street and house number, city, and post code).
- Use the cross in the lower-left corner of the screen to turn help on or off.
- When you're done with the mapping, just click the save button and you'll be redirected back to the initial administration dashboard.
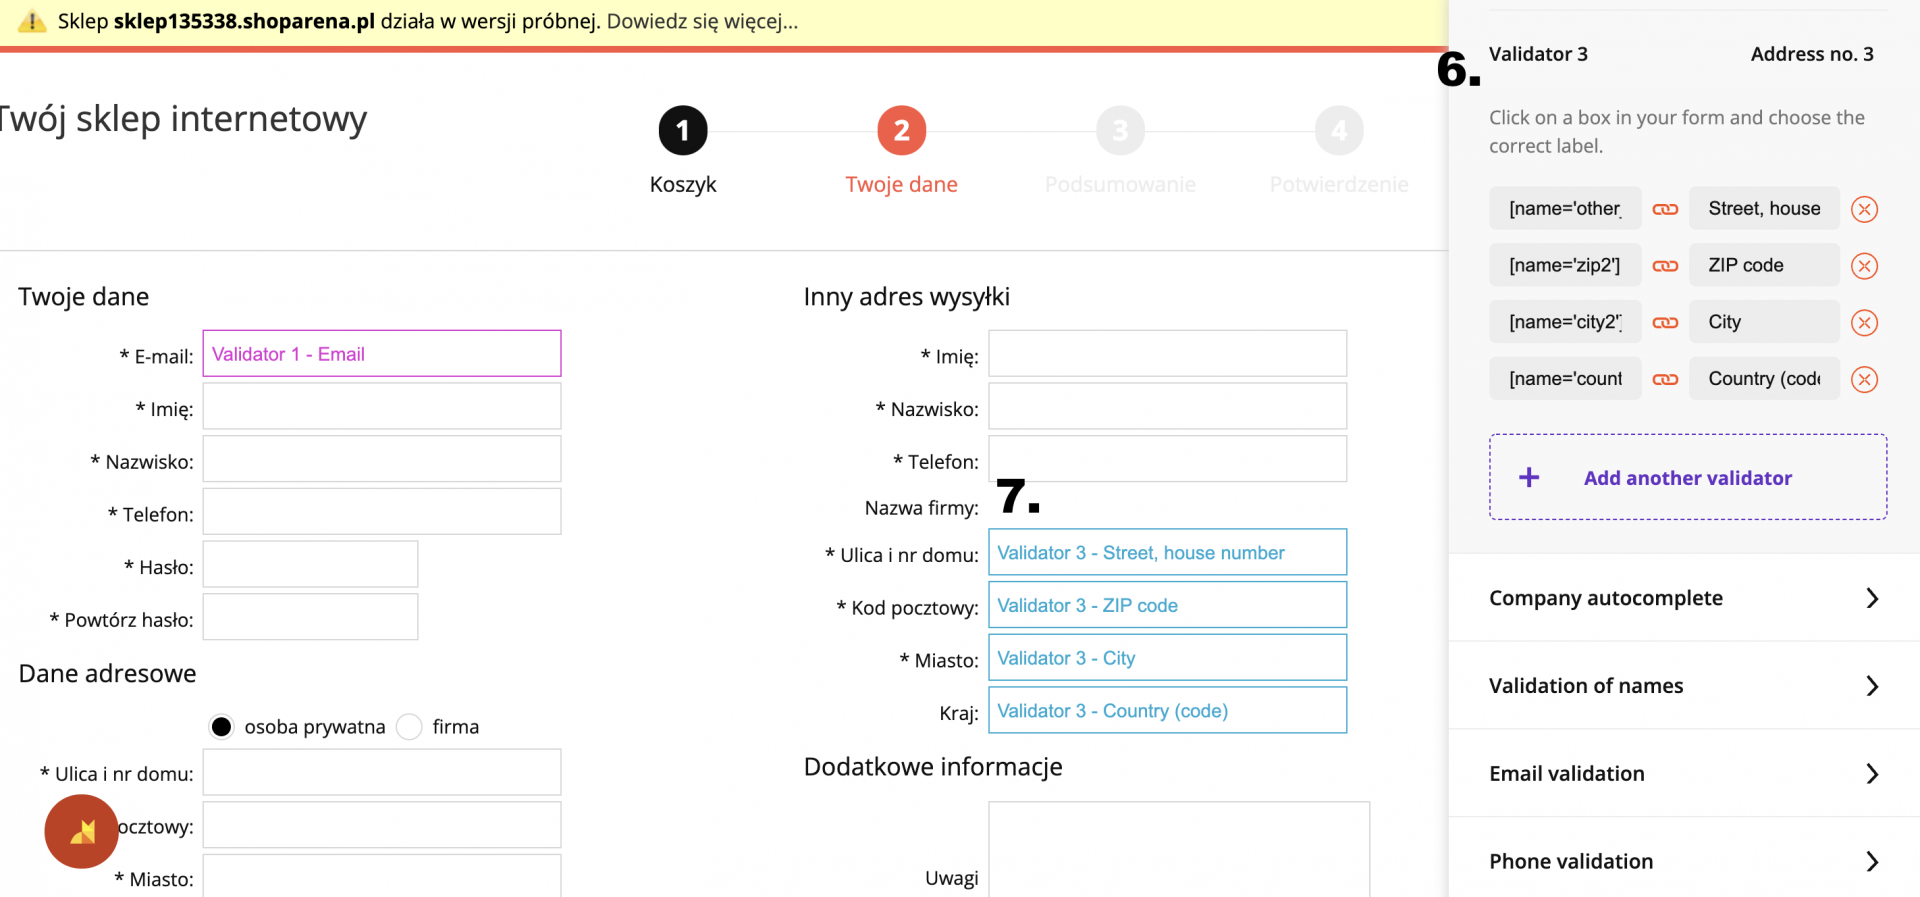
Each time you mark a column, the html identifier of the input and our associated label will be written in the right column. Here you have the option to delete the entry.
Multiple validators
In some forms, it's necessary to map more validators, eg for the "deliver to another address" option. You need the same functionality as in the previous point, while the only is difference that the individual addresses will not be linked (if you select the street from the autocomplete for the billing address, then that address should not be added to the delivery address). For such cases, it is advisable to set another validator:
- Click Add another validator on the right side of the web form. Then proceed as described above.
- Note that the next address validator is labeled Validator 2. It's necessary to label these inputs only with this validator.
Everything is mapped, what's next?
After setting up all services, click the save button and close the configurator. Now there's usually no need to set anything up and Foxentry should already be fully functional on your website. All validators are visible in the administration in the detail of each service. But, if you want, you can set up the entire service in more detail.
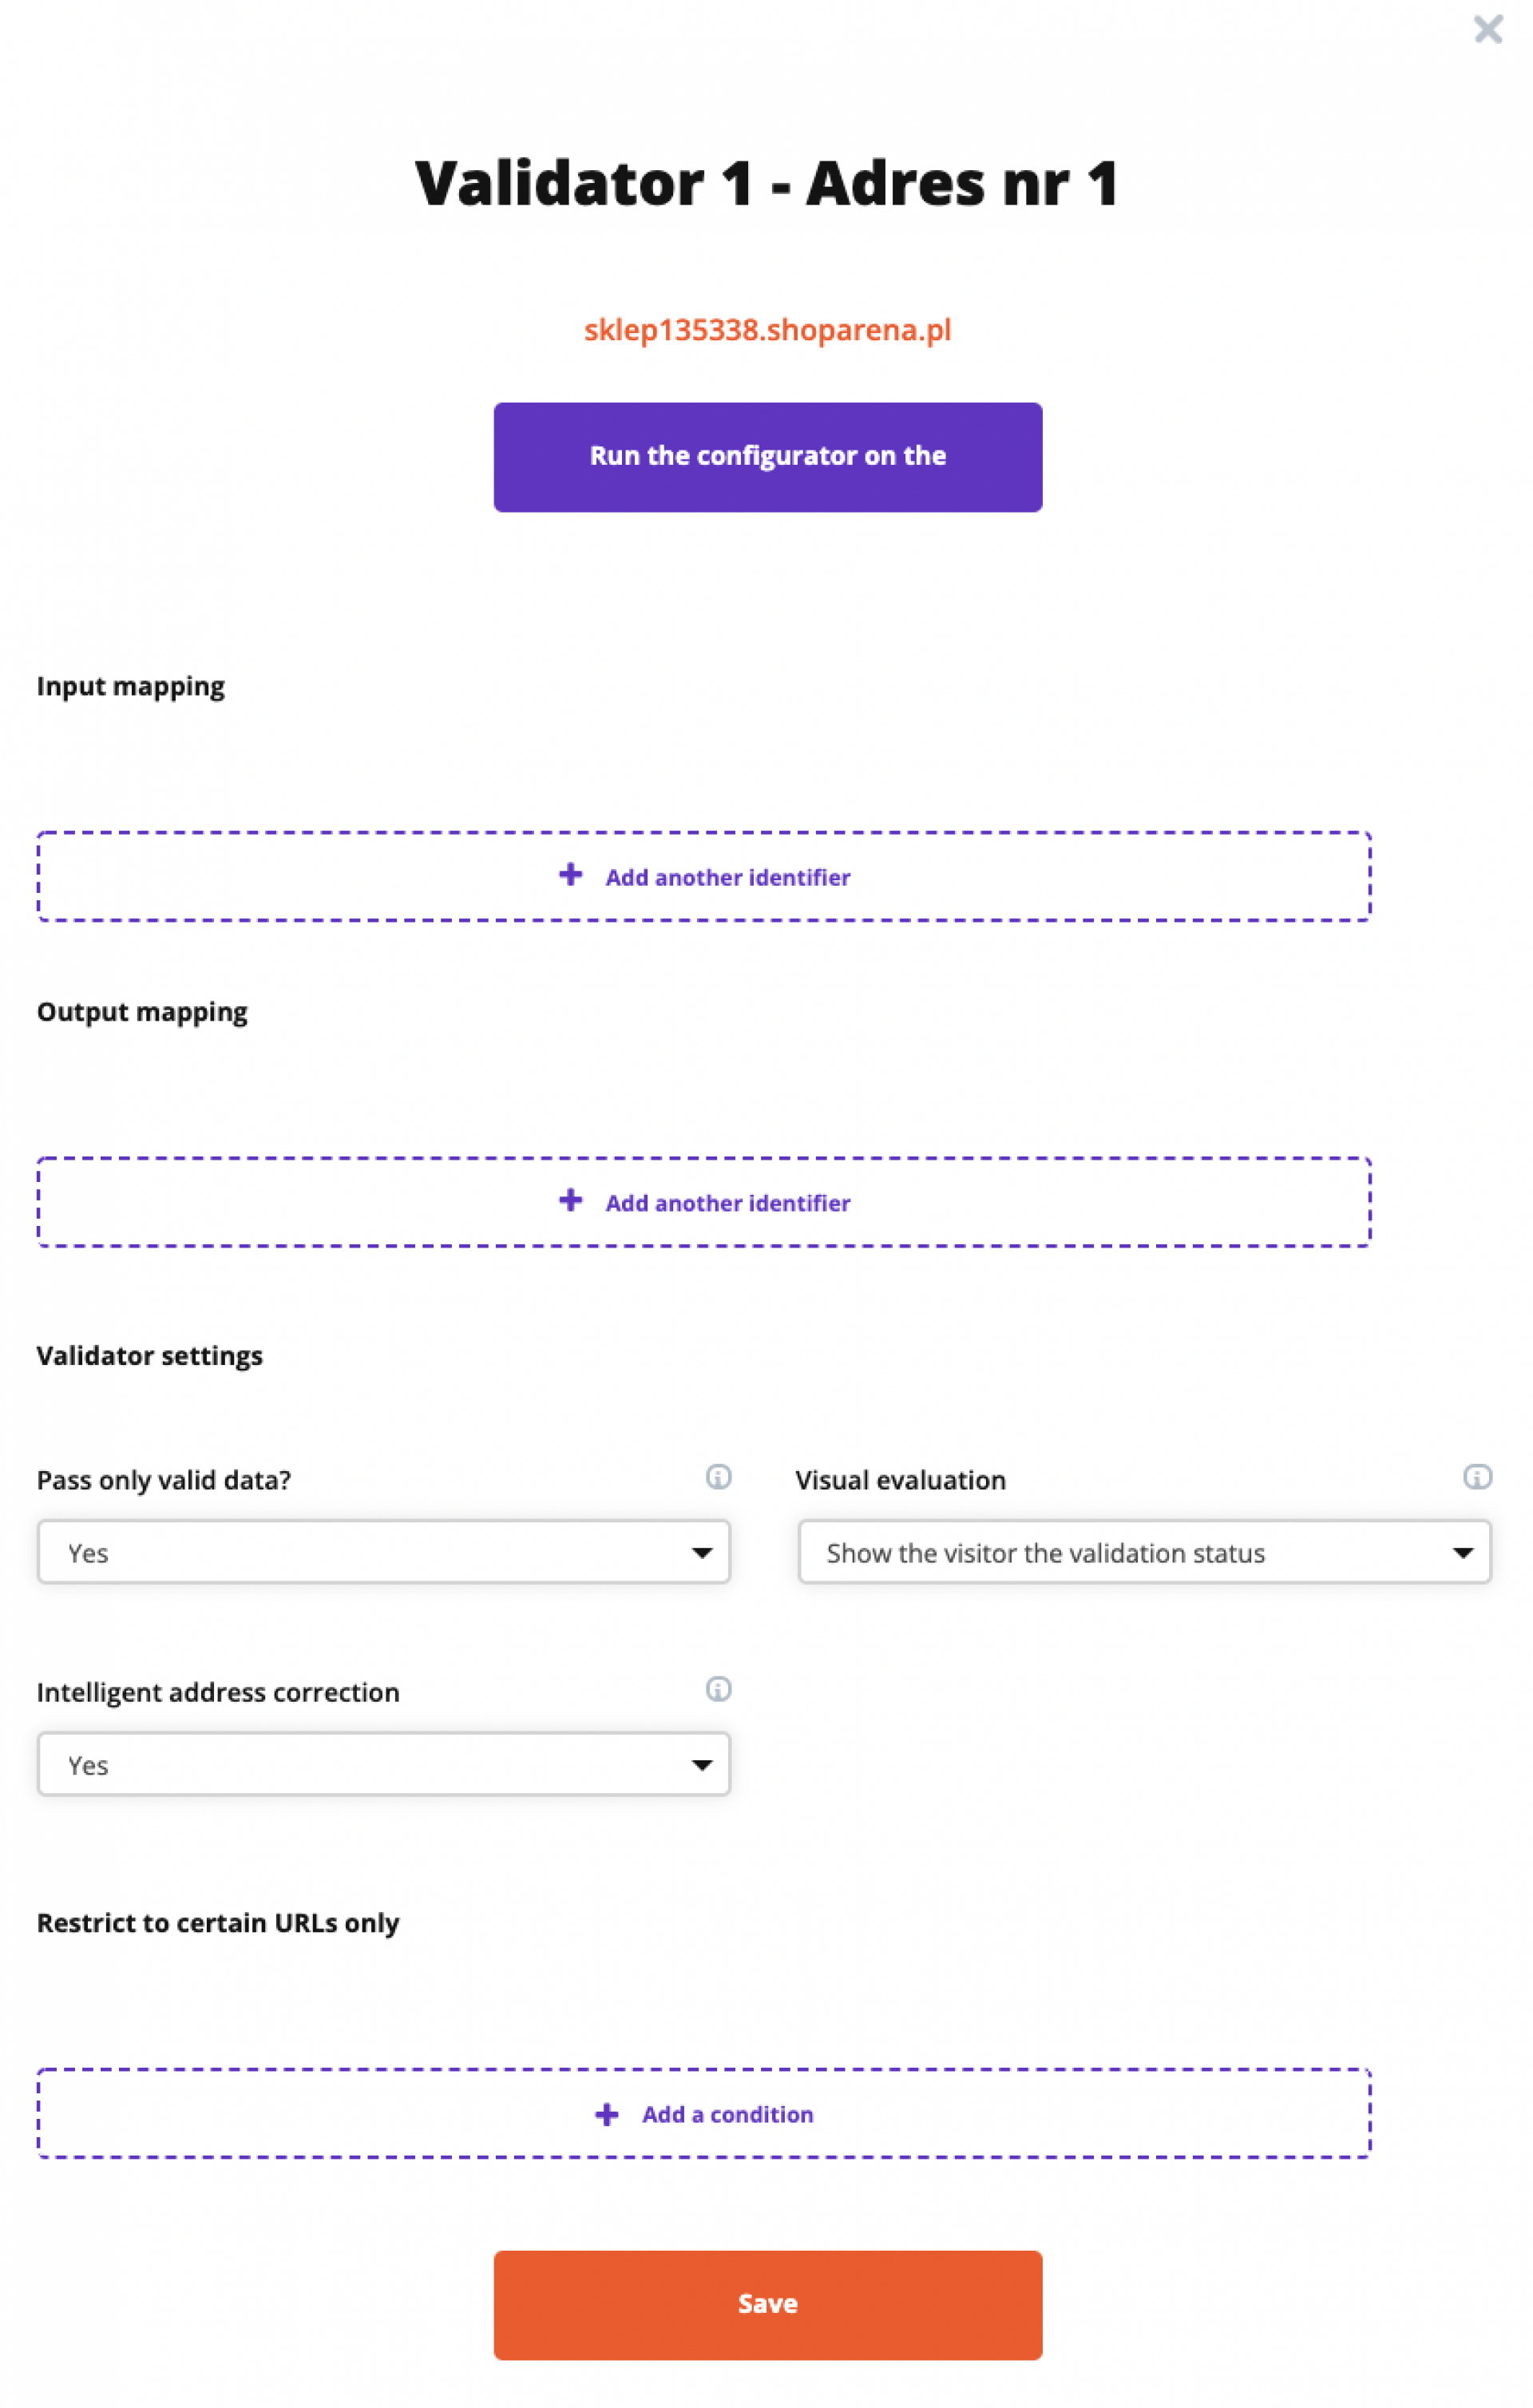
After clicking on Edit validator, you'll reach a pop-up window where you'll see all the IDs of the inputs that you've mapped using the web configurator. Here you can additionally modify the functionality of individual validators:
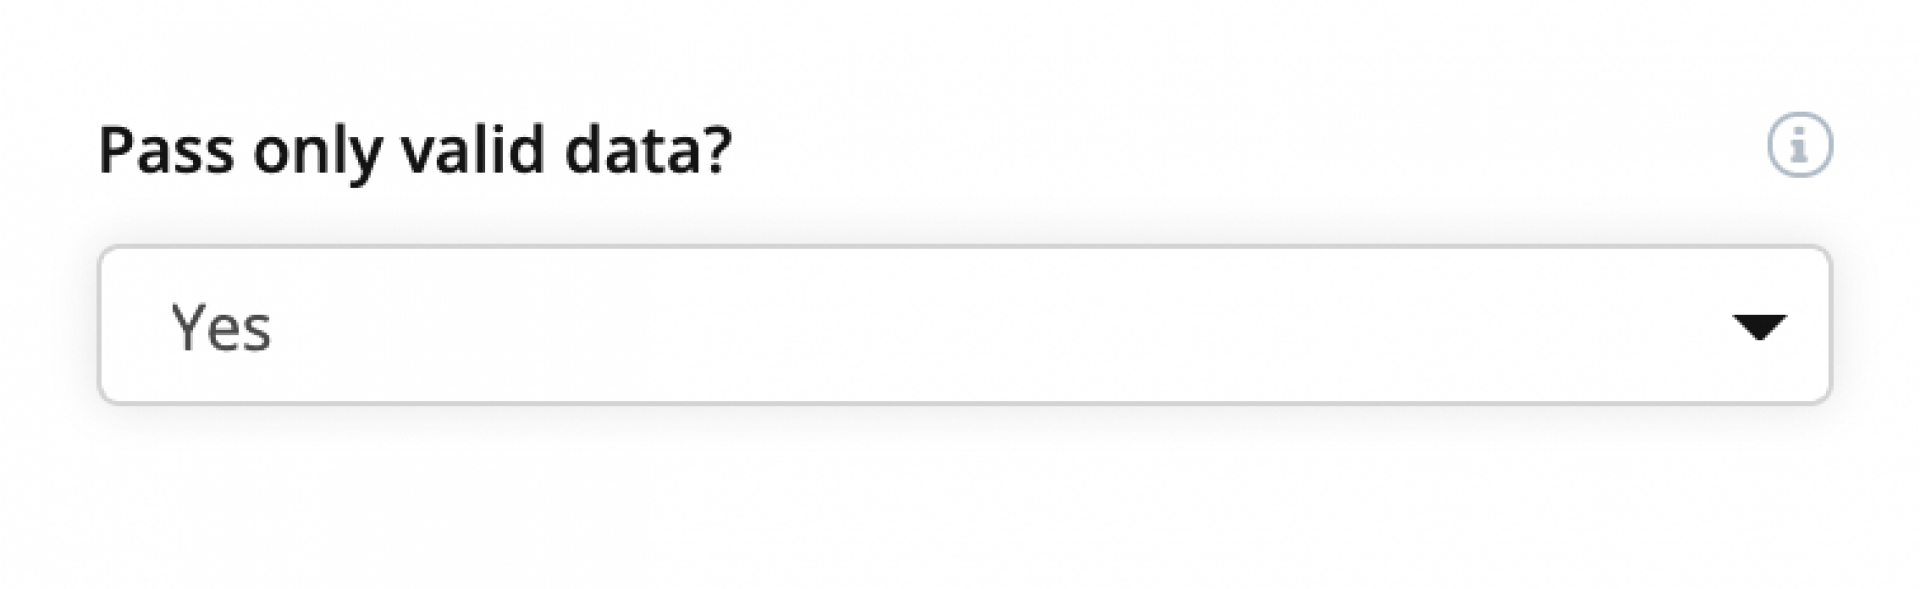
Passing only valid data - If you have this setting enabled, some data in the form might be evaluated as invalid (red border with a cross), and therefore the form should not be sent correctly (here it depends on the settings of your website - see callback). If you haven't enabled this setting, invalid entries will be marked with a maximum warning (orange border with an exclamation mark icon) and the form should be submitted after the correct setting.
Visual evaluation - here you set whether the validation status will be displayed to your customers only for valid values or even for invalid values, or whether the status should be displayed at all.

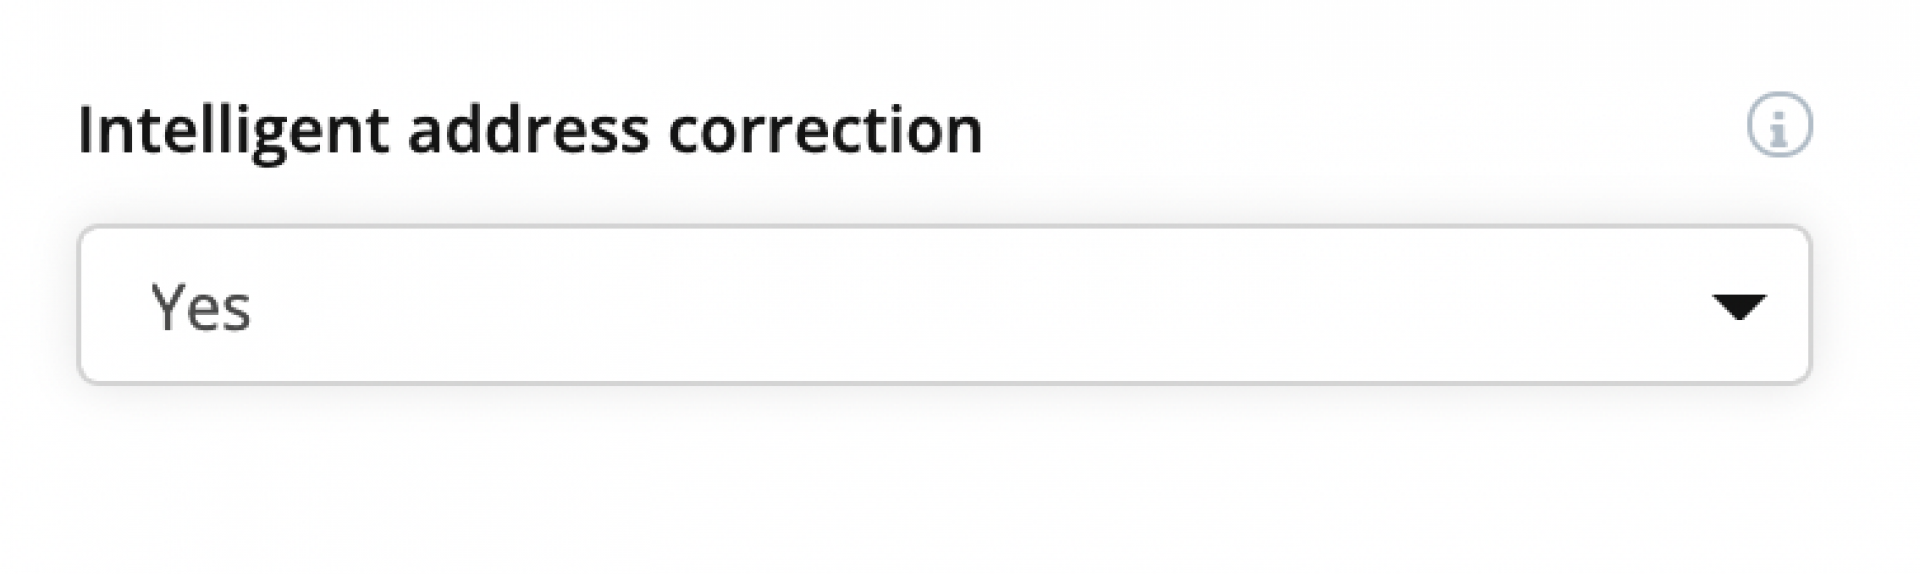
Intelligent address correction - When you run this feature, Foxentry will automatically populate incomplete data. For example, when entering the address Jeseniova 55, Foxentry will automatically correct it to Jeseniova 1151/55.
Restrict to certain URLs only - if you have Foxentry script embedded in all of your subpages, you may not want to use a validator on some of them. It is for these situations that URL restrictions are appropriate. Using simple conditions, you can enable or disable this validator on all URLs that begin with a specific word.

Example: I use an e-mail validator to collect e-mails for the newsletter on the home page of a website. However, I don't want to use it in web administration. So I choose the condition URL starting with /admin and I will disable it.