Installation to a web form
Insert the Foxentry script into the footer of your website
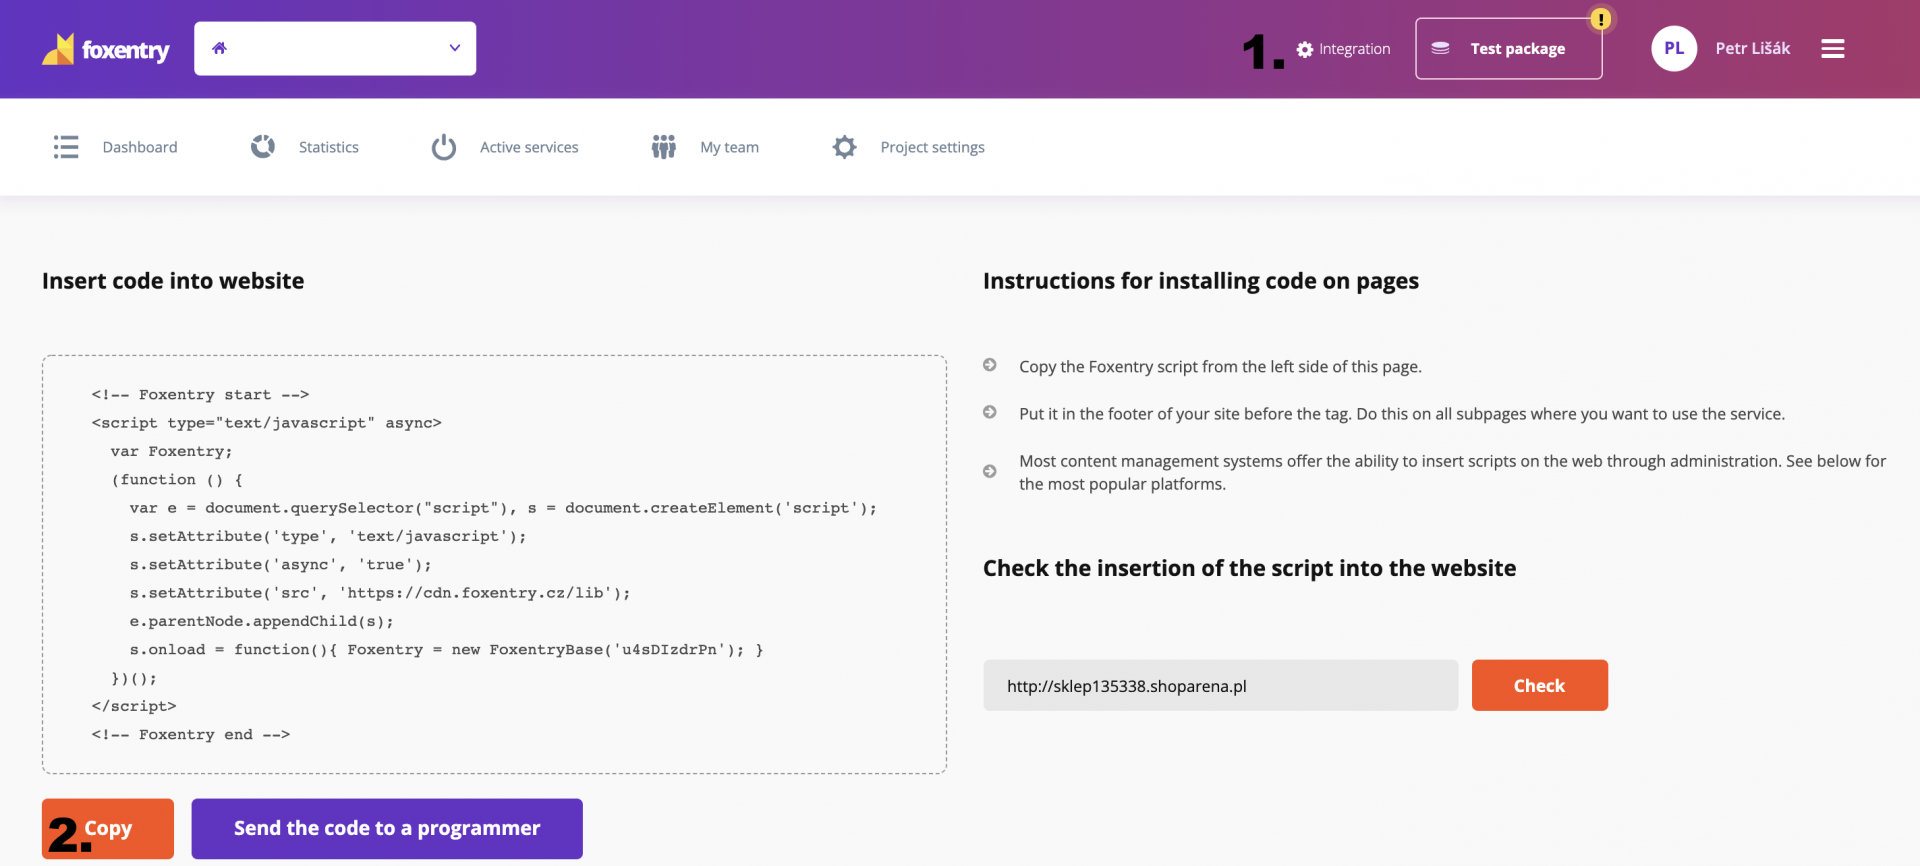
In your project, go to the integration subpage and copy your script. If you don't have a project yet, here are instructions on how to create one. Now you need to insert the script in the footer of your website or in the subpage where your form is located. If you paste the script code into the footer of the website, it should be displayed on all subpages, which doesn't matter (some websites have columns that you can use our services for on multiple subpages - such as newsletter boxes, contact forms, etc.).
If you use a more well-known platform such as WordPress, Shoptet, Prestashop, Eshop-rychle, it's quite likely that we have instructions directly for you. All documented platforms can be found here.
If you have your own system or you haven't found your platform, you can easily embed Foxentry directly into the code or use Google Tag Manager.
Mark the entries in your form
Since each site uses the name of the fields (entries) in the form a little differently, we need to inform our system about what they mean and how they should behave. Example - you use the "Address" field on your website for the street name and descriptive number, so you need to assign the correct functionality to this field.
There are two options:
- Using our interactive web configurator - if the script on your website is correctly embedded, just run the web configurator and go through your entire form in a new window and assign our equivalents to the fields.
- Manual assignment of html identifiers - this method requires at least a basic understanding of html. It's necessary to find the identifier of the field in the code and copy its ID (it can have different forms, eg #city, input [name = ’psc‘], etc.) into our administration.