Sky Shop
Updated this month
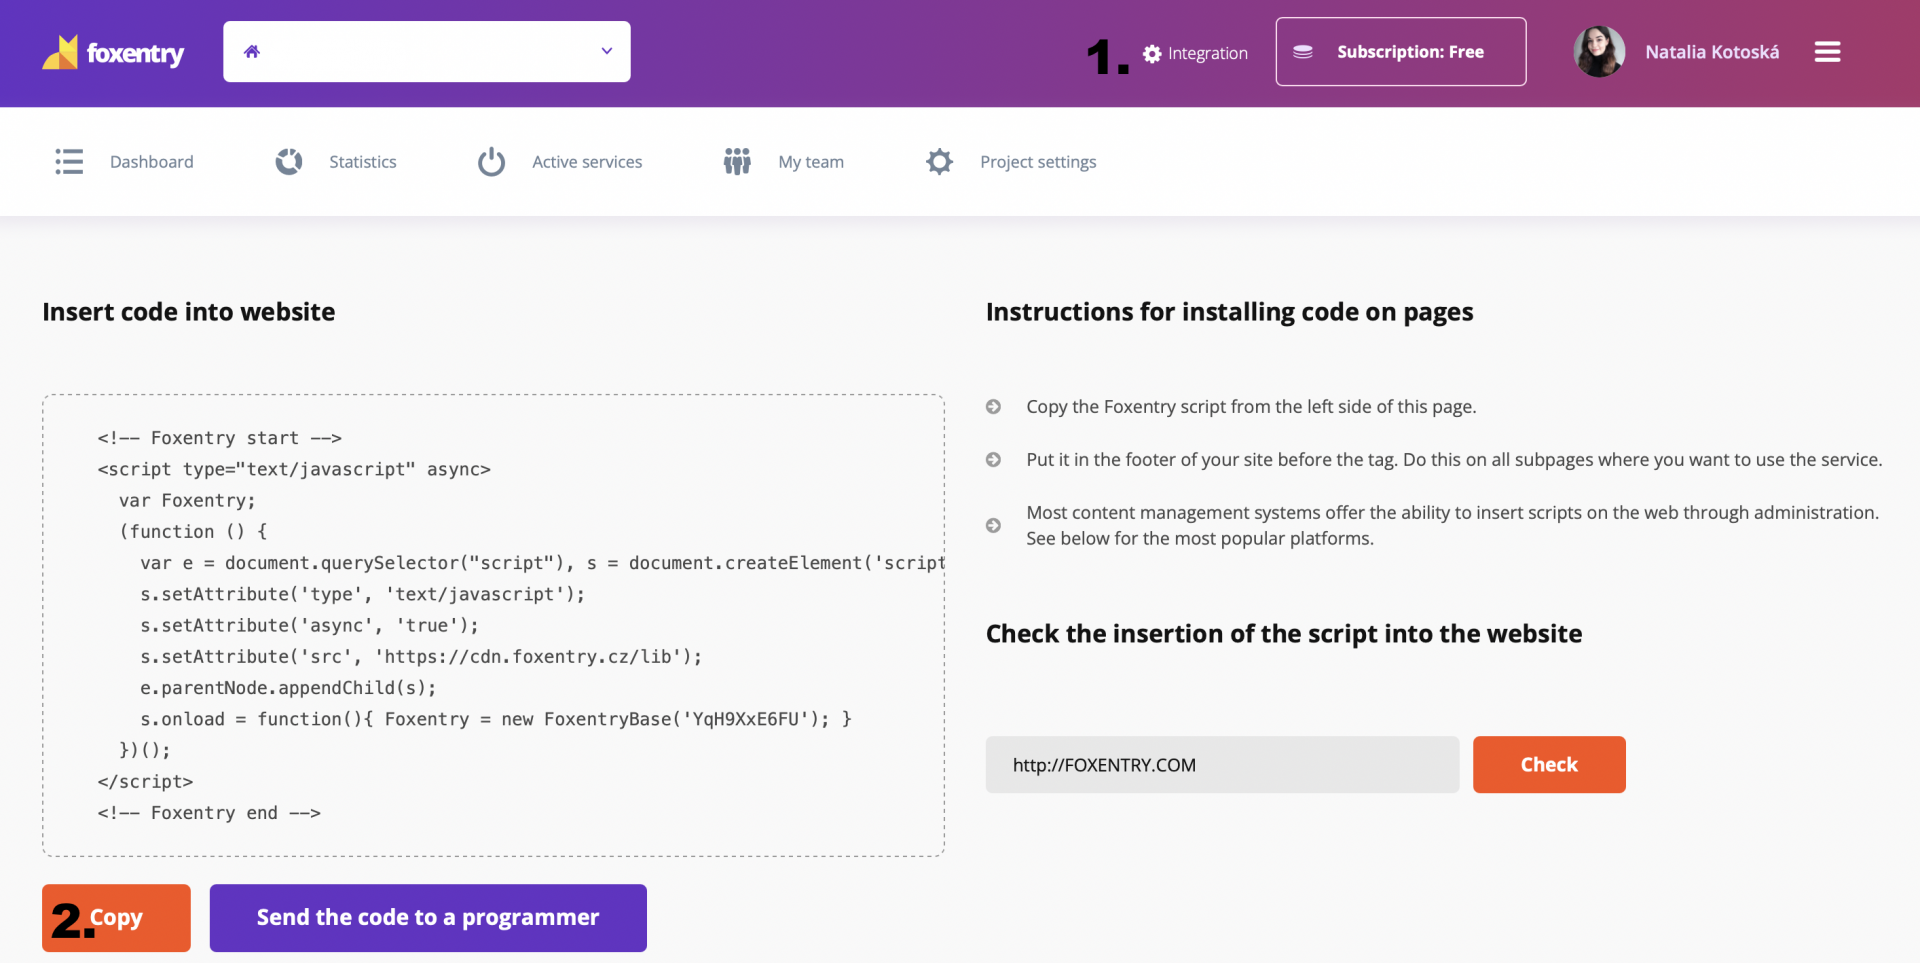
In the details of your project, click on integration (no. 1), then copy the script code on the left part of the screen (no. 2).
If you'll be using the Foxentry add-on only in the cart form, follow steps 3-6. If you'll also be using the Foxentry add-on on other subpages, for example in the registration form, follow points 3-15.
- Click on "Integracja" (no. 3)
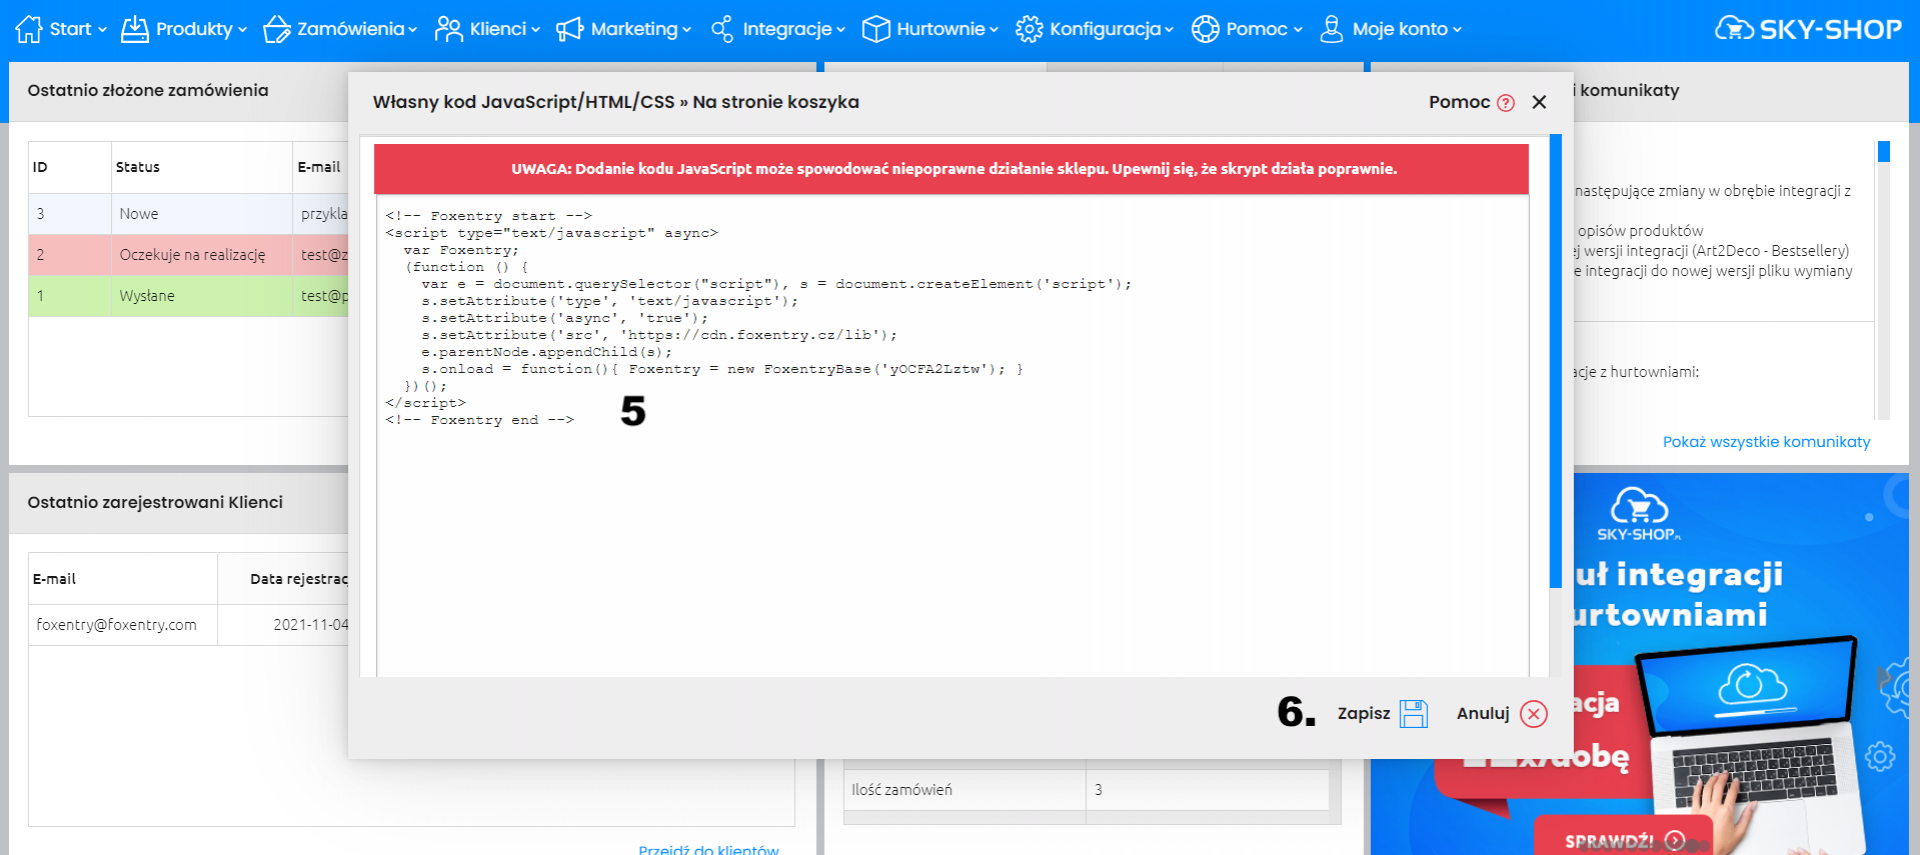
- Go to "Własny kod JavaScript/HTML/CSS" and click on "Na stronie koszyka" (no. 4)

- Paste copied ode to the field (no. 5)
- Click on "Zapisz po prawej stronie" (no. 6)
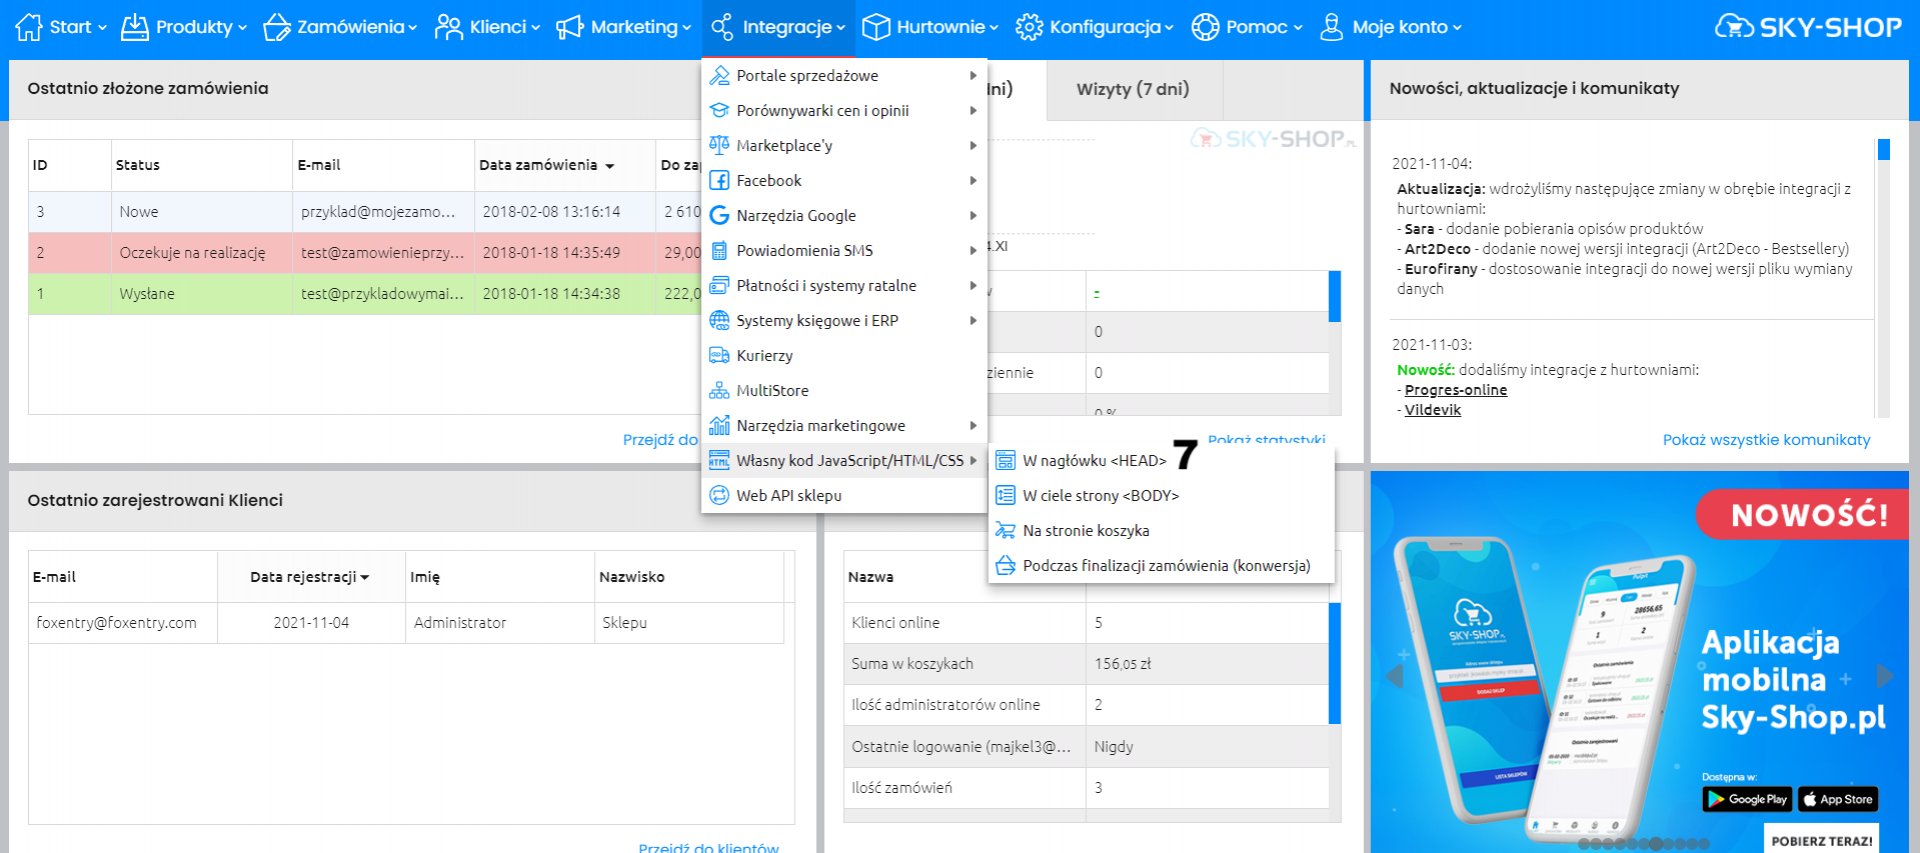
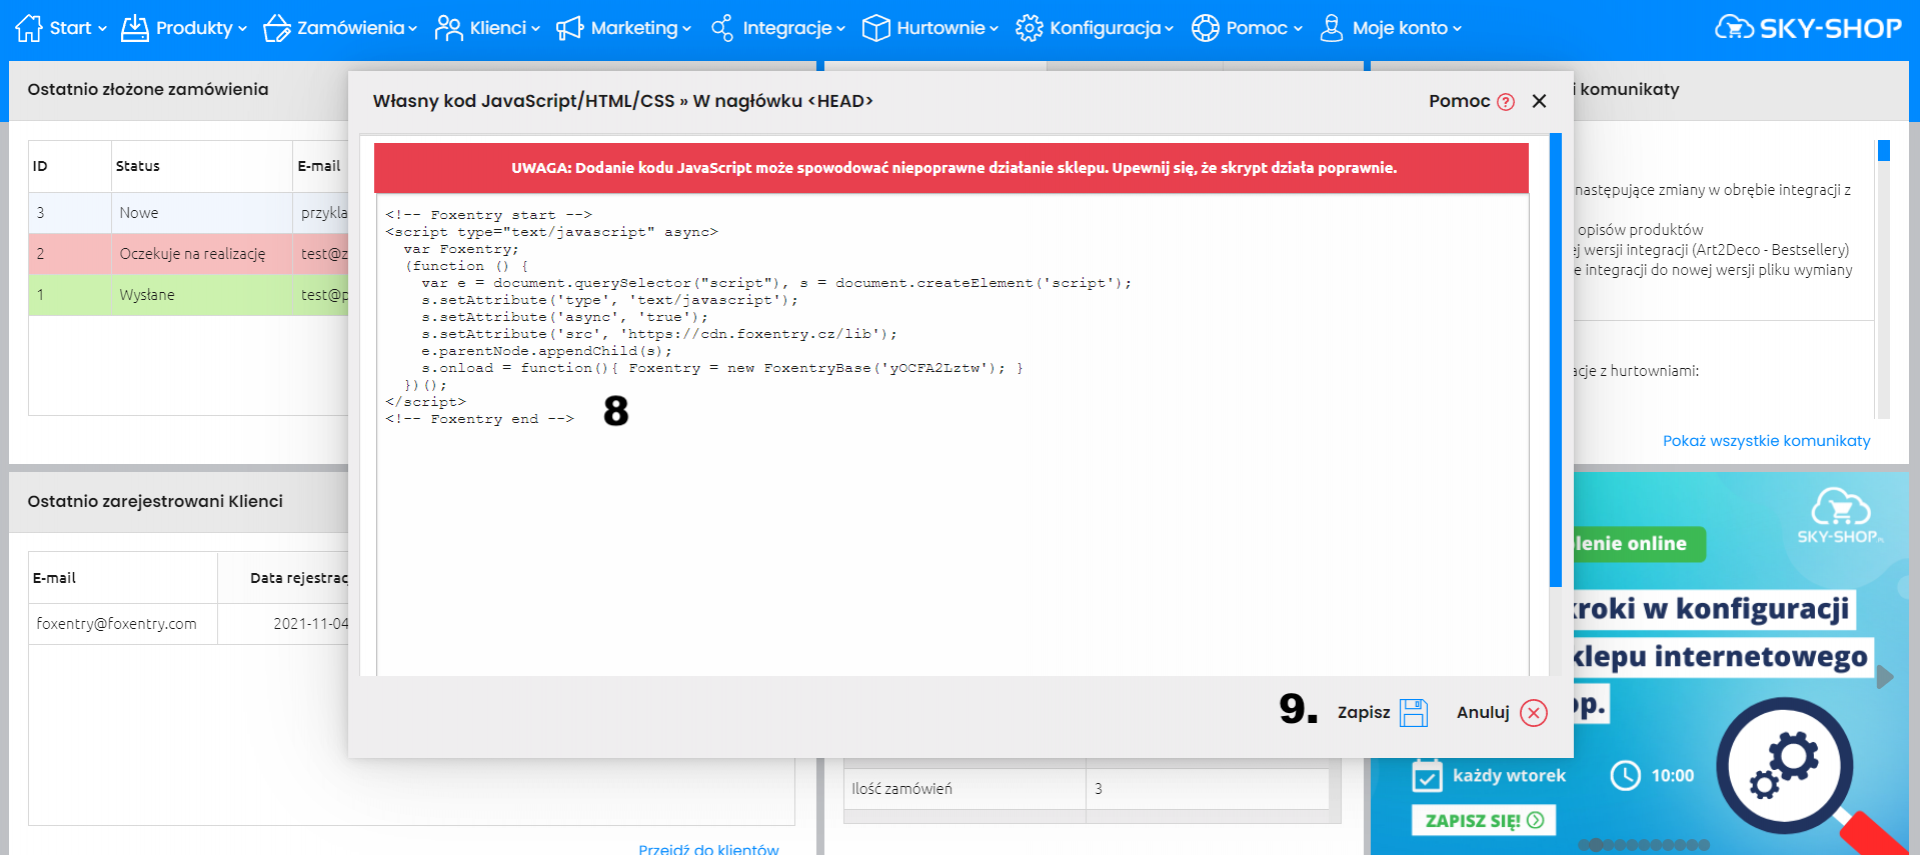
- Go to "Własny kod JavaScript/HTML/CSS" and click on "W nagłówku <HEAD>" (no. 7)
- Paste copied ode to the field (no. 8)
- Click on "Zapisz po prawej stronie" (no. 9)
- Go to "Własny kod JavaScript/HTML/CSS" and click on "W ciele strony <BODY>" (no. 10)

- Paste copied ode to the field (no. 11)
- Click on "Zapisz po prawej stronie" (no. 12)

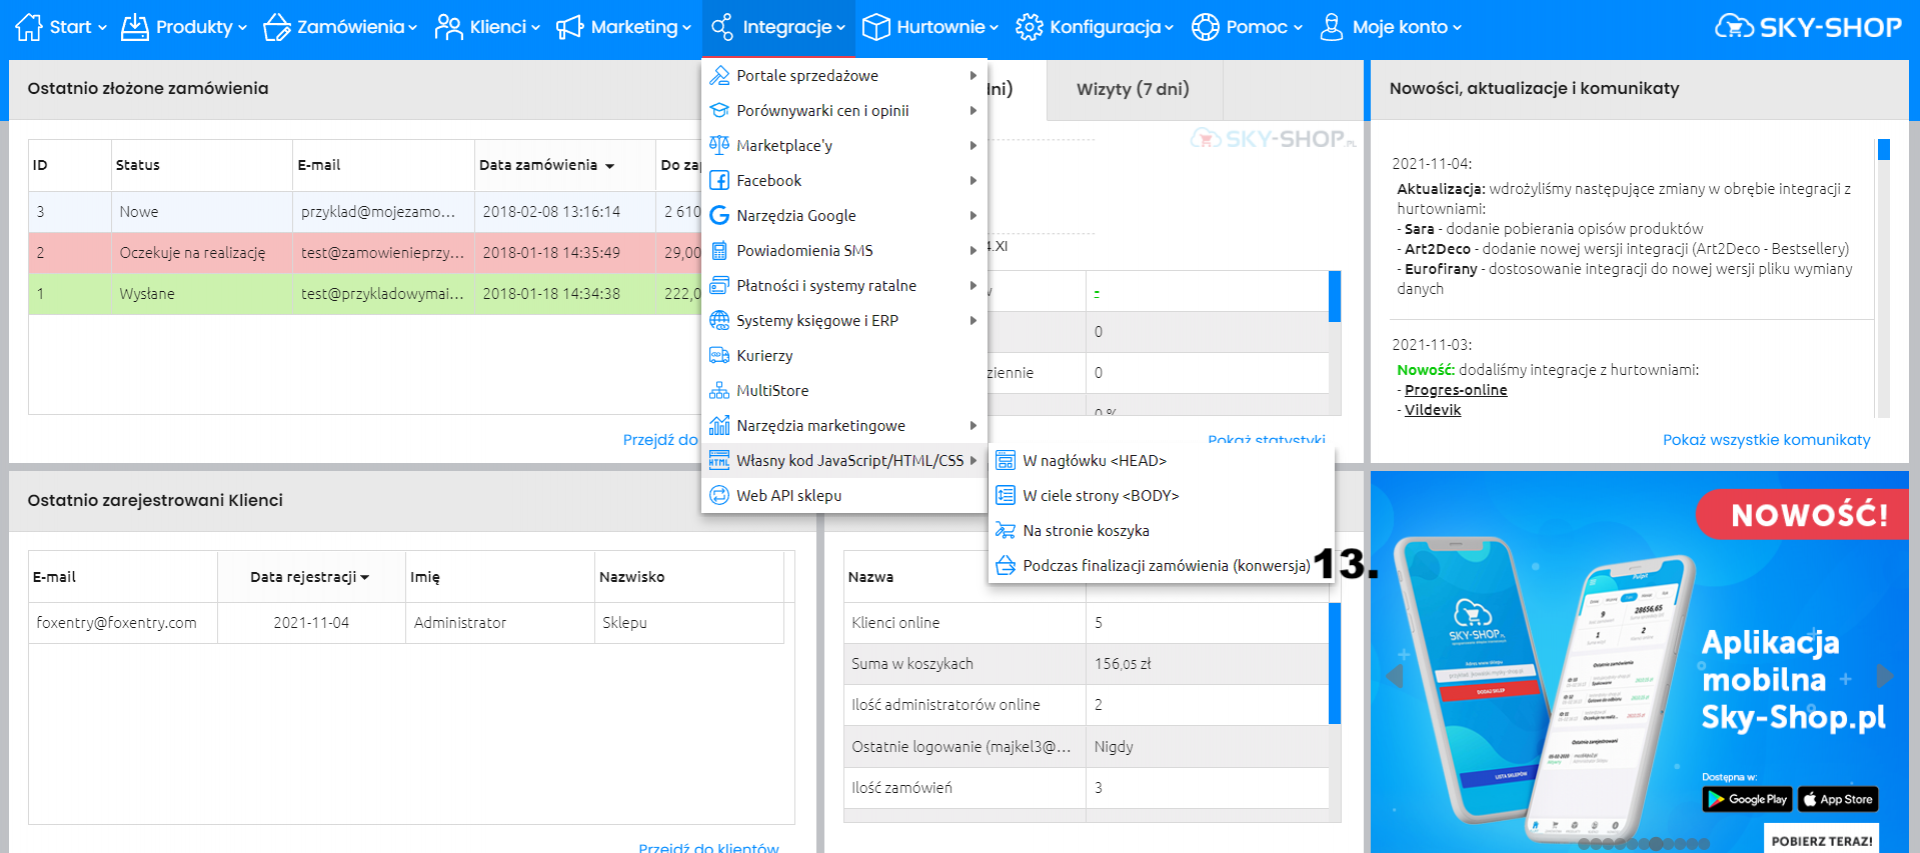
- Go to "Własny kod JavaScript/HTML/CSS" and click on "Podczas finalizacji zamówienia (konwersja)" (no. 13)
- Paste copied ode to the field (no. 14)
- Click on "Zapisz po prawej stronie" (no. 15)

The Foxentry script has just been pasted on all subpages. The last step is to set up validators, either using the interactive web configurator or manually assigning html identifiers.